
Propagation
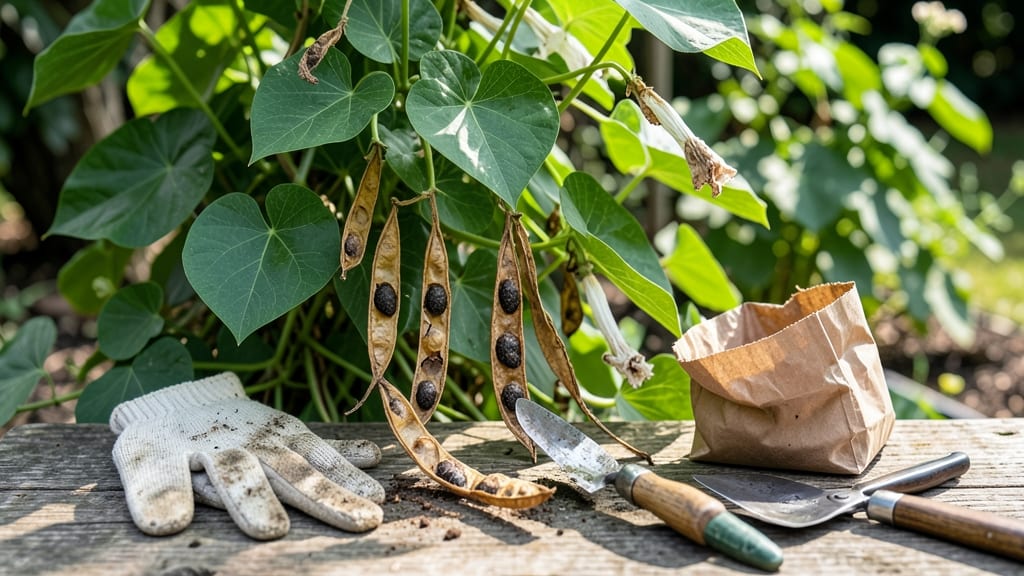
Harvesting moonflower seeds at the right moment transforms your garden from a one-season wonder into a year-round legacy. That moment comes when the pods turn brown and split open naturally—miss it, and you risk weak seeds that won’t grow into next year’s towering 🌙 vines.
I’ve learned the hard way that timing is everything—harvest too early, and the seeds won’t be viable; wait too long, and they’ll scatter in the wind.
The key lies in watching for those telltale signs: dry, papery pods that crack open on their own, revealing dark, hard seeds ready for collection.
In this guide, I’ll walk you through the exact steps to harvest moonflower seeds without losing a single one, plus storage tips to keep them potent for up to three years.
Whether you’re a first-time gardener or a seasoned pro, these techniques will ensure your moonflowers return stronger than ever.
Ready to turn those fleeting night blooms into a garden tradition? Let’s dive into the best practices that’ll have your moonflowers thriving for seasons to come.

Best time to harvest moonflower seeds for maximum germination
Moonflowers (Ipomoea alba) reach their seed-setting peak between late August and September in most climates, but the exact timing depends on your USDA zone and local weather. In Zone 6, I aim to harvest seeds by mid-September before the first frost threatens to crack open pods prematurely.
The goal is to collect seeds when they’re fully mature but before they scatter naturally—this ensures the highest germination rates for next year’s plants.
Environmental factors like humidity and temperature play a critical role. High humidity can delay pod drying, while dry, warm conditions speed up the process. If your area experiences unseasonably wet late summers, pods may stay green longer, trapping seeds inside.
Conversely, a dry heatwave can cause pods to split too quickly, sending seeds flying. Monitoring these conditions helps you predict the ideal harvest window.
Here’s how to spot the perfect moment: Look for pods that have turned deep brown and feel papery dry to the touch. When you gently squeeze them, they should crack open easily, revealing dark, hard seeds inside.
If the pods are still green or firm, they’re not ready—harvesting too early is the #1 mistake I see gardeners make, leading to low viability.
The critical window for harvesting moonflower seeds lasts about 2-3 weeks. During this time, pods transition from green to brown and begin splitting naturally. If you miss this window, seeds may lose viability or blow away entirely.
To avoid this, I recommend checking your plants weekly once pods form, starting in early August.
Temperature also affects seed quality. Seeds harvested in ideal conditions (60-75°F) store better than those collected after a heatwave or early frost.
In my experience, seeds collected during cool mornings (before 10 AM) have the highest germination rates because the pods are fully dry but haven’t been exposed to extreme heat. Always harvest on a dry, sunny day to prevent mold growth during drying.
Now, let’s break down the key stages of moonflower seed maturity with this quick reference table:
Once you’ve identified the optimal pods, act quickly to avoid losing seeds to wind or rain. I recommend harvesting on a dry morning when pods are fully dry but haven’t started splitting.
Use clean, sharp scissors to snip the entire pod from the vine, leaving a small stem attached. This prevents damage to the plant and makes drying easier.
If you’re in a humid climate, like the southeastern U.S., you may need to speed up the drying process. In these conditions, I’ve had success using a fan on low setting in a well-ventilated area to circulate air around the pods.
Avoid direct sunlight, which can cause seeds to overheat and lose viability. Instead, place pods in a shady, dry spot where temperatures stay between 70-75°F.
Seasonal timing also varies by region. In cooler northern zones (Zones 4-5), moonflowers may set seed earlier, around mid-August, while in warmer southern zones (Zones 8-10), pods may mature as late as October.
Always adjust your harvest schedule based on local weather patterns—if your area had an early frost, prioritize harvesting before temperatures drop below 50°F.
Pro tip: If you’re unsure whether your seeds are ready, perform the "float test". Drop a few seeds in a bowl of water—if they sink, they’re ready for storage.
If they float, they need more time to dry. This simple test has saved me from storing underripe seeds that would have molded in my storage containers.
By mastering these timing cues, you’ll turn your moonflower’s fleeting nighttime blooms into a self-sustaining garden tradition. Next, we’ll cover the step-by-step process for harvesting and storing these seeds to ensure they remain viable for years to come. 🌙
Step-by-step guide to harvesting and drying moonflower seeds
Once you’ve spotted those brown, papery pods on your moonflower vines, it’s time to act fast. The seeds inside are ready for harvest, but you’ll need to work carefully to avoid losing them to the wind or damaging the delicate seed pods.
I’ve found that using a clean, dry paper bag is my go-to method—it catches every seed while keeping them contained for drying.
Gently twist the dried pods from the vine, being careful not to crush them. If any seeds spill out during this process, simply scoop them up and add them to your collection.
The goal is to preserve as many seeds as possible for next year’s planting, so take your time with this step.
How to Harvest Moonflower Seeds
- 1 Wait for pods to dry: Harvest only when pods turn brown and papery, typically in late summer to early fall. Green pods mean seeds aren’t ready.
- 2 Collect pods carefully: Use gloves or tweezers to avoid skin oils contaminating seeds. Place pods in a paper bag to prevent moisture buildup.
- 3 Break open pods: Once dry, gently crush pods with your fingers or a clean mortar and pestle to release seeds. Avoid shaking to prevent seed loss.
- 4 Separate seeds: Use a fine mesh sieve to sift out debris, leaving only clean, dark seeds for storage.
After harvesting, you’ll need to dry the seeds properly to ensure their long-term viability. I recommend air-drying as the safest method—simply spread the seeds on a paper towel in a dry, well-ventilated area for 1-2 weeks. Avoid direct sunlight, which can overheat and damage the seeds.
If you’re short on time, you can use an oven-drying method, but proceed with caution. Set your oven to its lowest temperature (95°F or 35°C) and spread seeds on a baking sheet for 1-2 hours, checking frequently to prevent overheating.
This method is faster but riskier if not monitored closely.
Once fully dry, store your moonflower seeds in a paper envelope or glass jar with a silica gel packet to absorb moisture. Label the container with the harvest date—properly stored seeds remain viable for up to 3 years, though germination rates drop after the first year.
With these steps, you’ll have a stash of moonflower seeds ready to plant next spring, ensuring your garden stays filled with those enchanting nighttime blooms for seasons to come. Happy harvesting! 🌙🌱