
How To
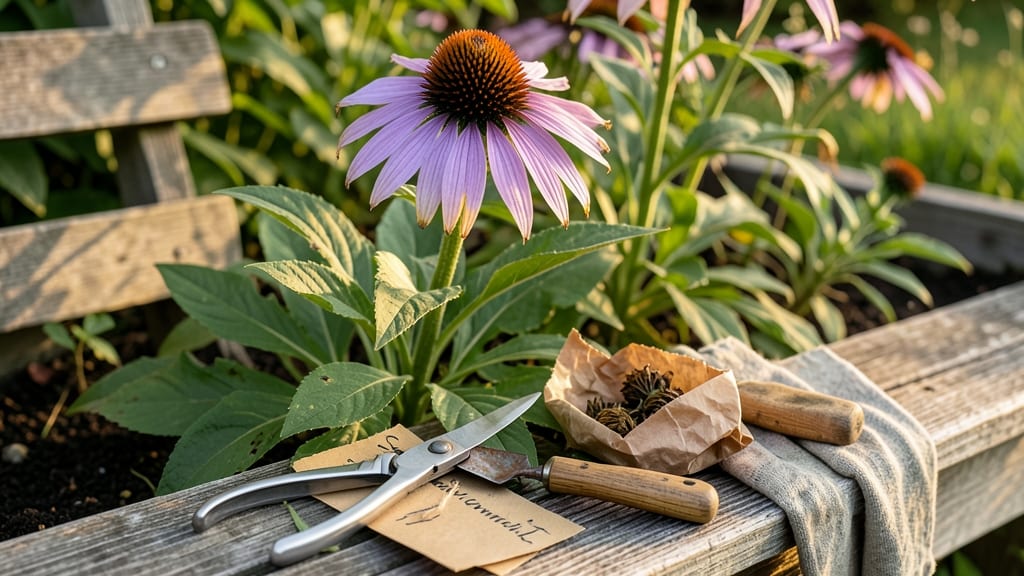
Harvesting purple coneflower seeds at the right time ensures you’ll have a fresh supply of 🌼 for next year’s garden—and skipping this step means missing out on nature’s free propagation.
The key is knowing exactly when those seed heads are ready, because harvesting too early or too late can ruin your chances of viable seeds.
If you’ve ever watched a purple coneflower bloom and wondered how to turn those dried centers into next season’s plants, you’re in the right place.
I’ll walk you through the exact timing (late summer to early fall) and visual cues to spot—like brown, papery petals and seeds that rattle when shaken—to guarantee you collect seeds at peak freshness.
Beyond timing, there’s an art to processing and storing these seeds so they stay viable until planting. From cutting the seed heads to drying them properly, I’ll cover every step to avoid common mistakes that waste hard-earned seeds.
Whether you’re saving them for your own garden or sharing with fellow plant lovers, these tips will make the process simple and stress-free.
Ready to turn this year’s purple coneflowers into next year’s blooms? Let’s dive into the step-by-step guide that’ll have you harvesting like a pro—no guesswork required.

When to harvest purple coneflower seeds: best timing for maximum viability
Timing is everything when harvesting purple coneflower seeds—miss the window, and you risk collecting seeds that won’t germinate or attracting pests like squirrels before they ripen. The ideal harvest period spans from late August through early October, aligning with the plant’s natural seed maturation cycle.
This timing ensures seeds are fully developed but haven’t yet scattered or sprouted in place.
Weather plays a crucial role in seed viability. Dry, warm conditions speed up maturation, while humid or rainy weather can cause seeds to mold or sprout prematurely in the cone. If your region experiences early frosts, prioritize harvesting by mid-October to avoid seed damage.
I’ve learned the hard way that waiting too long can mean losing your entire seed crop to hungry wildlife or frost!
Look for these visual cues to confirm seed readiness: the central cone turns deep brown, petals fall away or become brittle, and seeds rattle when you gently shake the dried head. If you see green seeds or moist centers, they’re not ready—harvesting too early reduces germination rates dramatically.
I always test a few seed heads by breaking them open to check for fully formed seeds.
Here’s a quick seasonal checklist to avoid missing your harvest window:
| Seasonal Stage | Key Visual Cues | Harvest Action | Weather Considerations |
|---|---|---|---|
| Late Summer (August) | Petals begin wilting, seed heads turn light brown | Monitor daily for full browning | Dry heat speeds maturation |
| Early Fall (September) | Seed heads fully brown, seeds rattle when shaken | Harvest immediately (peak viability) | Avoid rain before harvest |
| Mid-Fall (October) | Petals fallen, stems woody | Harvest if frost threatens | Frost kills unharvested seeds |
| Post-Frost (November+) | Seed heads may split open | No viable seeds left | Seeds scatter or rot |
One common mistake I see is harvesting seeds when they’re still slightly green inside. Improperly dried seeds won’t store well and may develop mold. To test readiness, cut open a seed head—if the seeds inside are brown and dry, it’s harvest time.
If they’re still green or sticky, wait another week. I’ve saved countless seed batches by following this simple test!
Regional climate affects timing too. Gardeners in warmer zones (USDA 8-10) may harvest as early as July, while those in cooler climates (USDA 3-6) should wait until September or October.
I once missed my harvest in a wet September, and my seeds sprouted in the cones—always check your local frost dates and adjust accordingly.
Pro tip: Mark your calendar for two weeks after the first frost as your final harvest deadline. By then, most seeds will have matured or been lost to wildlife. I use colorful plant markers to tag my coneflowers in early summer so I don’t forget which plants to watch.
This small step has saved me from harvesting the wrong plants!
If you’re unsure about seed readiness, err on the side of waiting. Overripe seeds lose viability quickly, while underripe seeds can still develop if left on the plant.
I’ve had success leaving a few seed heads unharvested to attract pollinators while collecting others for storage. Balance is key—don’t harvest your entire garden at once!
Remember that seed viability drops sharply after harvest. Store seeds in a cool, dry place (like a paper envelope in the fridge) immediately after processing. I’ve seen germination rates drop from 90% to 20% when seeds weren’t stored properly—don’t let that happen to your hard-earned harvest! 🌾
Step-by-step guide to harvesting and processing purple coneflower seeds
Now that you’ve identified your purple coneflower seed heads as ready for harvest, it’s time to collect and process them properly. The difference between a high-yield harvest and wasted seeds often comes down to the tools you use and the techniques you follow.
I’ve perfected my method over years of trial and error—let me walk you through the exact steps to maximize your seed collection while preserving purity for germination.
Gather these essential tools before starting: a pair of clean, sharp pruning shears, a large paper bag or breathable mesh sack, a small bowl for seed separation, and a drying rack or screen.
Avoid plastic bags—they trap moisture and encourage mold. I keep a dedicated seed-processing kit in my garage for quick access during harvest season. The right tools make all the difference in efficiency and seed quality.
-
Step 1: Cut the Seed Heads
Use your pruning shears to cut the dried seed heads about 2-3 inches below the base. Work on a dry day to prevent moisture from sticking to the seeds. Place each cut head immediately into your paper bag—this prevents seeds from scattering and keeps them organized by plant.
-
Step 2: Dry the Seed Heads
Spread the seed heads in a single layer on a drying rack or screen in a well-ventilated area out of direct sunlight. This prevents overheating and maintains seed quality. I use an old wire cooling rack in my garage with a small fan circulating air—this speeds drying without risking mold.
-
Step 3: Separate Seeds from Chaff
Once completely dry (usually 3-5 days), rub the seed heads gently between your hands or use a seed separator screen to remove seeds from the chaff. Discard any green or shriveled seeds—they won’t germinate. I save the clean seeds in a labeled paper envelope for immediate storage.
-
Step 4: Clean and Store
Use a fine-mesh sieve to remove any remaining chaff from your seeds. Store them in a cool, dry place (like a sealed envelope in the fridge) for up to 3 years. Label each batch with the harvest year and variety to track germination rates over time.
One common mistake I see is over-handling wet seeds, which can damage their protective coatings. Always let seed heads dry completely before separation—wet seeds are prone to mold.
I once lost an entire batch of seeds because I rushed the drying process during a humid September. Patience pays off when it comes to seed processing!
For large harvests, consider using a seed thresher attachment on your lawnmower to speed up the process. Simply run the dried seed heads through the attachment, then separate the seeds from the chaff with a screen.
This method works well for gardeners with multiple coneflower plants. Just be sure to clean your equipment thoroughly between uses to avoid cross-contamination.
Pro tip: If you’re saving seeds for long-term storage, add a moisture absorber packet to your storage container. I’ve used silica gel packets in my seed envelopes to maintain optimal humidity levels.
This simple step can extend seed viability from 1-2 years to 3-5 years. Always test a small batch of seeds for germination before committing to large-scale planting.
Remember to leave a few seed heads on the plant to feed pollinators and ensure natural reseeding. I typically harvest only 70-80% of my mature seed heads to maintain a balance between propagation and ecosystem support.
The right approach ensures you have seeds for next year while keeping your garden thriving for wildlife. 🌾